+86-579-87217855
 ykdc@dingchuncup.com
Choose Responsibility Choose Dingchun
-BSCI Certified S/S Tumbler


-BSCI Certified S/S Tumbler
Oct 02,2026
Common Insulated Cups With Straw Problems and What Buyers Should Check
Insulated straw cups are staples across cafe counters, promo setups, retail shelves, and private-label drinkware lines. They might look clean and simple on a catalog page, but a slick picture won't show you how a tumbler holds up to real-world drops and daily washing.
Glitchy components can show up anywhere—from a loose lid thread or brittle plastic straws to leaky silicone seals and weak shipping boxes. For bulk buyers, distributors, and sourcing managers, even a tiny flaw like a misaligned rubber seal triggers a wave of consumer returns, negative store reviews, and extra warehouse triage.
Because of that, you have to look past the catalog sample and review these cups from a raw line-level perspective. Sourcing teams need to explicitly audit leak paths, thermal holding times, straw clearance, base materials, dishwashing access, and batch-to-batch manufacturing limits before signing off on a production order.
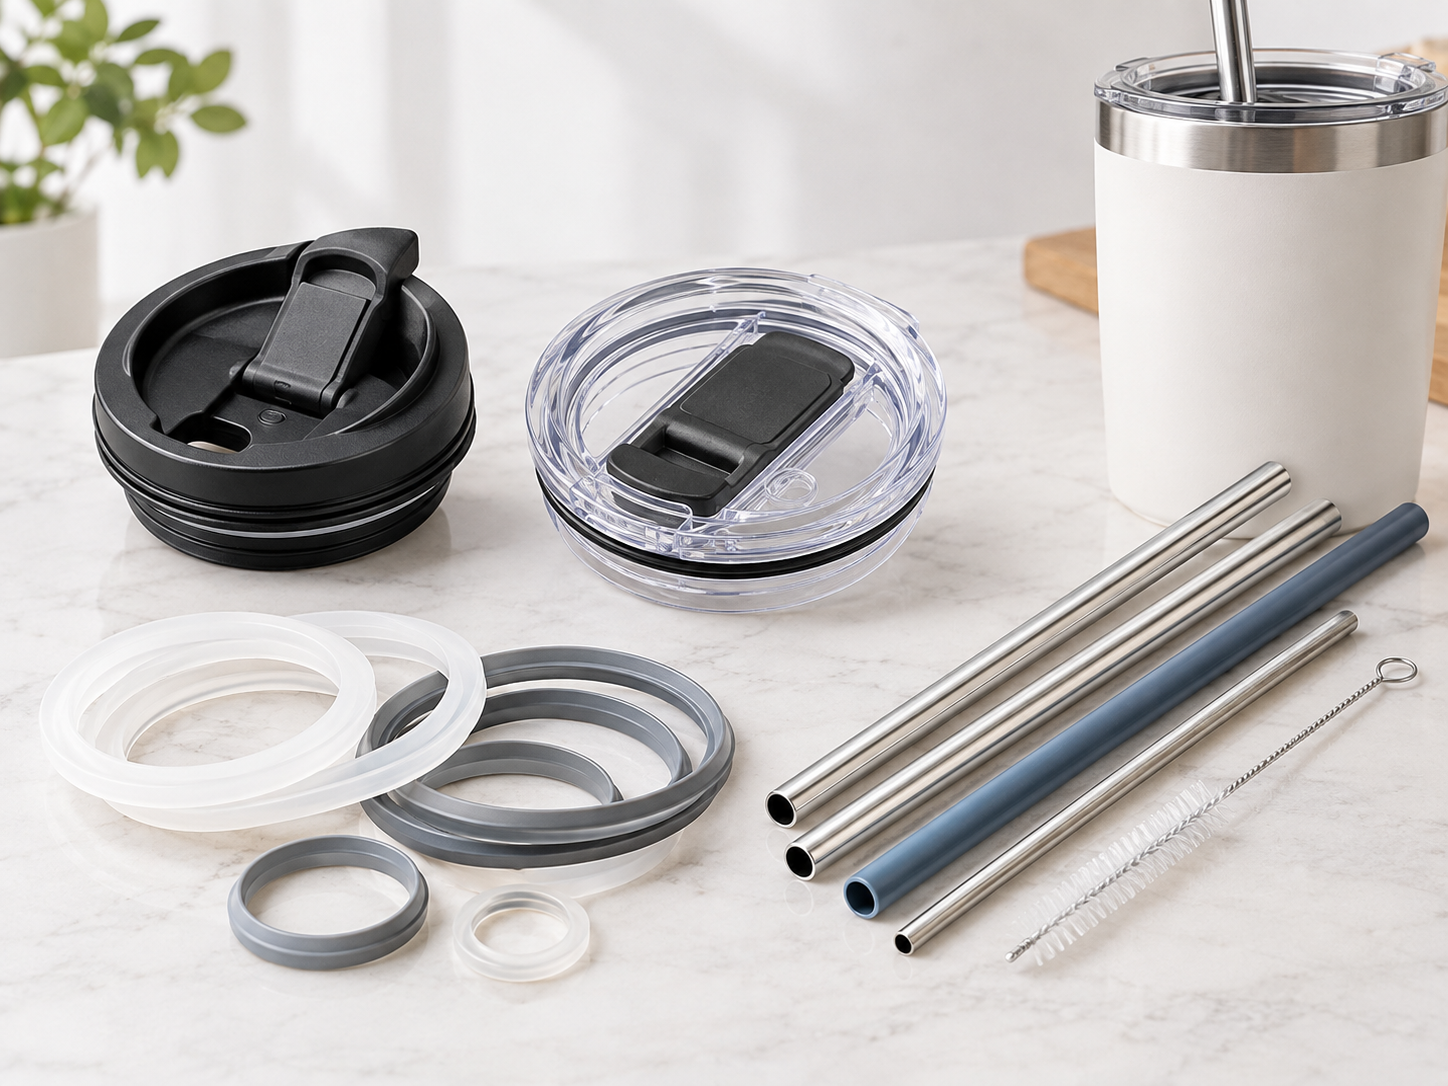
Insulated Cup Leakage Is One of the Common Problems
A leaky seal is easily the fastest thing a consumer notices, and it completely ruins the user experience. Even if the main double-wall body is forged nicely, liquid will still find a way out through the lid threads, the straw slot, or a twisted rubber seal.
The biggest mistake buying teams make during a bench trial is only checking the cup while it sits flat on a table. Out in the wild, consumers are throwing these tumblers into gym bags, holding them sideways while walking, or knocking them over onto car seats.
Run your test samples through multiple field positions before approving the run:
|
Area to Check |
Possible Problem |
Buyer Test |
|
Lid connection |
Loose threads or an un-centered snap fit |
Screw it on and off dozens of times to check wear |
|
Silicone gasket |
Soft spots, warped edges, or seating slips |
Check how the rubber squeezes inside the groove |
|
Straw opening |
Water spraying out from the straw slot |
Tip the cup sideways and hold it completely upside down |
|
Lid closure |
Flip tabs or sliders failing to seal fully |
Click the closure open and shut repeatedly |
|
Cup rim |
Rough metal lips that don't match the lid flat |
Feel the top stainless edge for burrs or waves |
For wholesale orders, make sure to ask the factory manager exactly what kind of pressure or vacuum test they run on the assembly line. Locking down a clear QA inspection metric gives you an explicit benchmark to reference if a batch lands wet.
The Straw Can Affect Both Sealing and Drinking Comfort
The straw might seem like a basic plastic tube throw-in, but its exact thickness and material dictate whether the cup actually functions nicely.
If the tube diameter doesn't match the lid slot perfectly, you are going to get heavy splashing. A slot that is way too snug makes the straw a pain to slide in, which ends up chewing up the soft rubber seal over time. Plus, the inner diameter changes your drinking flow completely.
Before ordering, buyers should check whether the straw:
For commercial sourcing managers, talk about replacement straw sets before the main freight loads. Retail buyers lose and chew through straws constantly, so your distributors will need extra accessory packs to handle aftermarket care.
The type of beverage matters too. A straw intended for water or cold drinks may feel different when used with thicker beverages such as smoothies or shakes.
Insulation Performance Needs a Consistent Test Method
Sourcing teams need to verify whether the vacuum wall actually lives up to the hours listed on your marketing copy.
A tumbler doesn't automatically hold ice just because it feels heavy or looks thick. The true thermal holding time depends on the vacuum gap quality, the thickness of the inner lid plastic, seal integrity, and how tightly the factory manages the manufacturing line.
When you are benchmarking separate samples, keep your field metrics completely identical. Use the exact same liquid volume, starting hot or cold temp, ambient room temperature, test duration, and thermometer tool to get a fair comparison.
|
Test Factor |
Why It Matters |
|
Initial temperature |
Sets an exact baseline so you aren't guessing |
|
Beverage volume |
Less liquid inside changes how fast the core heat drops |
|
Test duration |
Gives you a clean look at heat loss over 6 to 12 hours |
|
Ambient conditions |
Stuffy testing rooms mask a poorly insulated wall |
|
Lid condition |
A leaky slider vent bleeds core heat instantly |
|
Measurement method |
Improves repeatability |
Ask the factory representative for their official laboratory thermal logs and the exact setup they used to get those numbers. This is a massive deal if you plan on printing those hourly thermal claims straight onto your retail boxes, store pages, or catalog sheets.
Silicone Gaskets Deserve More Attention
The rubber gasket is a tiny, cheap component, but it handles the entire job of keeping the tumbler bone-dry.
If the cup design allows for disassembly, pluck the rubber ring straight out of its channel during your sample check. Inspect the seal under a good light for tiny cuts, warped edges, flash molding trash, or uneven thicknesses.
Don't just accept vague terms like "food grade" on the spec sheet either. Sourcing teams need a proper paperwork trail—demand material safety logs, lab test records, and regional compliance declarations that match your local market laws.
Always link the physical sample directly to the factory paperwork. The metal sample shows you the workmanship, while the compliance sheets confirm the raw compound is clean and safe.
Lid Fit and Thread Accuracy Influence Daily Use
Since most insulated straw cups rely on screw-on lids, the way those threads match up needs to stay completely uniform across the whole run.
A lid that forces your customers to wrestle with the cup just to lock it down is a quick way to get bad reviews. Flip side, a loose lid wobbles around and ruins the rubber seal. Sloppy thread matching also leads to cross-threading or uneven pressure on the gasket ring.
When checking samples, don't just spin the lid on once and call it a day. Do it over and over. Check if the spin stays smooth, feels solid, and stops at the exact same alignment point every single time.
If you are running custom private-label molds, iron out your dimensional tolerance limits before the machines start stamping. The approved sample on your bench and the final bulk shipping containers must hold to the exact same measurements.
Cleaning Problems Can Lead to Customer Complaints
Reusable tumblers have to be easy to wash, otherwise they turn into a mold risk fast. An insulated cup is packed with tiny crevices where old drink residue, milk, or sugar can build up—like inside the straw tube, under the rubber ring, inside the lid vents, or around the sliding tabs.
Before greenlighting a product run, tear the sample completely down according to the factory's cleaning guide and inspect each part individually.
Keep an eye on these specific spots:
|
Cleaning Point |
What Buyers Should Check |
|
Straw interior |
Can a standard cleaning wire clear out the center path? |
|
Gasket area |
Can a worker pop the ring out without using a sharp tool? |
|
Lid underside |
Are there deep, narrow plastic channels that trap dried juice? |
|
Closure |
Do the sliding or moving parts snap apart for proper washing? |
|
Cup body |
Does the interior provide practical access? |
Make sure the factory provides clear, honest care guidelines. Never assume a tumbler is safe for the dishwasher across all components—frequently, the painted outer coats or lids will warp or peel under high heat.
For retail setups, printing straightforward cleaning tips right on the box stops users from ruining the cups and filing false warranty claims.
Unusual Odor and Taste Transfer Should Be Checked
A funky chemical smell during unboxing is a massive red flag that you shouldn't ignore.
Sure, a brand-new cup fresh out of a plastic sleeve might have a faint manufacturing smell. The real test is whether that chemical odor vanishes completely after a basic wash using standard dish soap.
Run a simple floor test: scrub the cup and its accessories down, fill it with clean room-temperature water, let it sit, and then check the smell and taste. If you are marketing the cup for a specific drink, fill it with that exact beverage to see if the lining absorbs flavors or metallic notes.
This field check doesn't replace formal chemical testing, but it gives your sourcing team a fast way to check the actual consumer unboxing experience.
Capacity and Dimensions Need Clear Definitions
Fluid capacity numbers can get highly confusing on retail product pages.
A cup marketed as a 40-ounce tumbler might only hold 36 ounces of actual liquid once you drop the heavy lid and straw assembly into place. Sourcing managers should always demand the raw brim capacity, true usable fill volume, total outer measurements, and empty weight.
These numbers are critical for writing accurate retail listings, but they matter even more when calculating box sizes, ocean freight stacking, and customs tariffs.
For B2B contracts, make sure these exact specifications are written down in black and white:
Keeping these numbers locked inside one master document prevents costly logistical mix-ups between your factory coordinators, packaging designers, and freight forwarders.
Buyers Should Inspect Multiple Samples
A single golden sample proves the factory can build a great cup, but it tells you absolutely nothing about how consistent the assembly line runs when turning out thousands of units.
Whenever possible, ask for a dozen separate pieces pulled from a live production run. Line those units up side by side and cross-check thread smoothness, rubber ring positions, straw clearance, paint finishes, base diameters, and tip-over leak behavior from one piece to the next.
Tiny variations in plastic molding can completely ruin how separate pieces fit together. This is a massive deal when you have multiple interlocking components that all need to lock down tightly.
The factory needs to outline their internal QA workflow—including how they check incoming steel sheets, mid-line plastic stamps, and finished cup lots. For major inventory purchases, hire a third-party inspection agency to run a pre-shipment audit at the factory dock using your agreed quality limits.
Appearance and Branding Should Be Part of Quality Control
For private-label drinkware lines, visual consistency is what keeps your brand looking premium on store shelves.
Sourcing teams must inspect the outer color matching, laser-etched or printed logo placement, powder coat texture, lid transparency, and accessory color blending against the signed benchmark sample.
For instance, a logo print might look perfectly straight on your layout sheet but start shifting or slanting across a massive production line if the factory's positioning jigs are loose.
It is useful to approve a reference sample and keep the final artwork, color specification, dimensions, and packaging requirements together with the purchasing documents. That gives both sides a fixed reference when the finished goods are inspected.
Packaging Can Affect Product Quality During Shipping
Your quality control checks don't stop the second the cups leave the manufacturing floor.
Stainless steel tumblers will land at your warehouse covered in scratches, deep dents, cracked lids, or bent straws if the interior packaging sleeves are too thin to handle rough transit.
Before confirming a bulk order, buyers should review:
|
Packaging Detail |
Purchasing Consideration |
|
Individual packaging |
Protects the cup surface |
|
Accessory placement |
Helps prevent straw or lid damage |
|
Carton strength |
Important for stacking and transportation |
|
Inner protection |
Reduces movement inside cartons |
|
Carton quantity |
Supports freight planning |
|
Carton dimensions |
Needed for shipping calculations |
For international import accounts, your packaging needs to survive the entire logistical gauntlet—including rough port handling, damp shipping containers, bumpy overland freight, and long warehouse storage cycles.
Questions Buyers Should Ask an Insulated Cup Supplier
Sourcing talks need to look past basic unit pricing and minimum order thresholds.
Buyers can ask:
A Practical Pre-Order Checklist for B2B Buyers
Before you sign off on a massive production contract for insulated straw cups, run your samples through this straightforward floor scorecard:
|
Check Item |
Approval Focus |
|
Cup body |
Appearance, dimensions, construction |
|
Lid |
Fit, closure, alignment |
|
Gasket |
Position, condition, sealing |
|
Straw |
Fit, stability, drinking flow |
|
Leakage |
Upright, tilted, and transport-position tests |
|
Insulation |
Consistent test conditions |
|
Cleaning |
Ease of disassembly and care |
|
Odor |
Check after proper washing |
|
Branding |
Logo, color, printing accuracy |
|
Packaging |
Protection during transportation |
|
Documentation |
Material and applicable compliance records |
Turn these checklist steps straight into your formal purchasing agreement. That way, your quality controllers have a clear set of rules to enforce during production runs and dock inspections.
What Buyers Should Review Before the Purchase Order
Sourcing an insulated straw cup is way more complicated than just picking a nice catalog layout and comparing unit prices. A successful product launch starts with understanding your specific retail demographic, then grinding down the sample specs until you have a bulletproof product blueprint.
When you are auditing wholesale drinkware vendors, focus your energy on testing seal paths, straw fit, thermal retention times, rubber quality, easy cleaning access, verified safety sheets, assembly tolerances, logo printing accuracy, and ocean-ready box builds.
The sample approval process should also be repeatable. The approved sample, product specifications, inspection requirements, and supporting documents can serve as the reference for the bulk order. For brand owners, distributors, cafe chains, and private labels, this rigorous tracking protects your capital, locks in your product quality, and cuts customer complaints down to zero.
Your email address will not be published. Required fields are marked *



 +86-579-87217855
 ykdc@dingchuncup.com
 +86-579-87217600
 No.169 Yingbin Avenue, Industrial function zone, Xiangzhu Town, Yongkang Zhejiang, China.
OEM Thermos Mugs Manufacturer
 English
 Español
 عربى
عربى